


Chartreuse Vibes - Hunter Coat Review
I was super excited to try this pattern when I first laid eyes on it for many reasons. It met a lot of the criteria I had been searching for in a coat – the collar + lapel style, the welt pockets, the fit. Then a year went by after I bought the pattern because I couldn’t find the right fabric for it. Once I found this gorgeous chartreuse wool blend, I knew I was ready to give it a go!

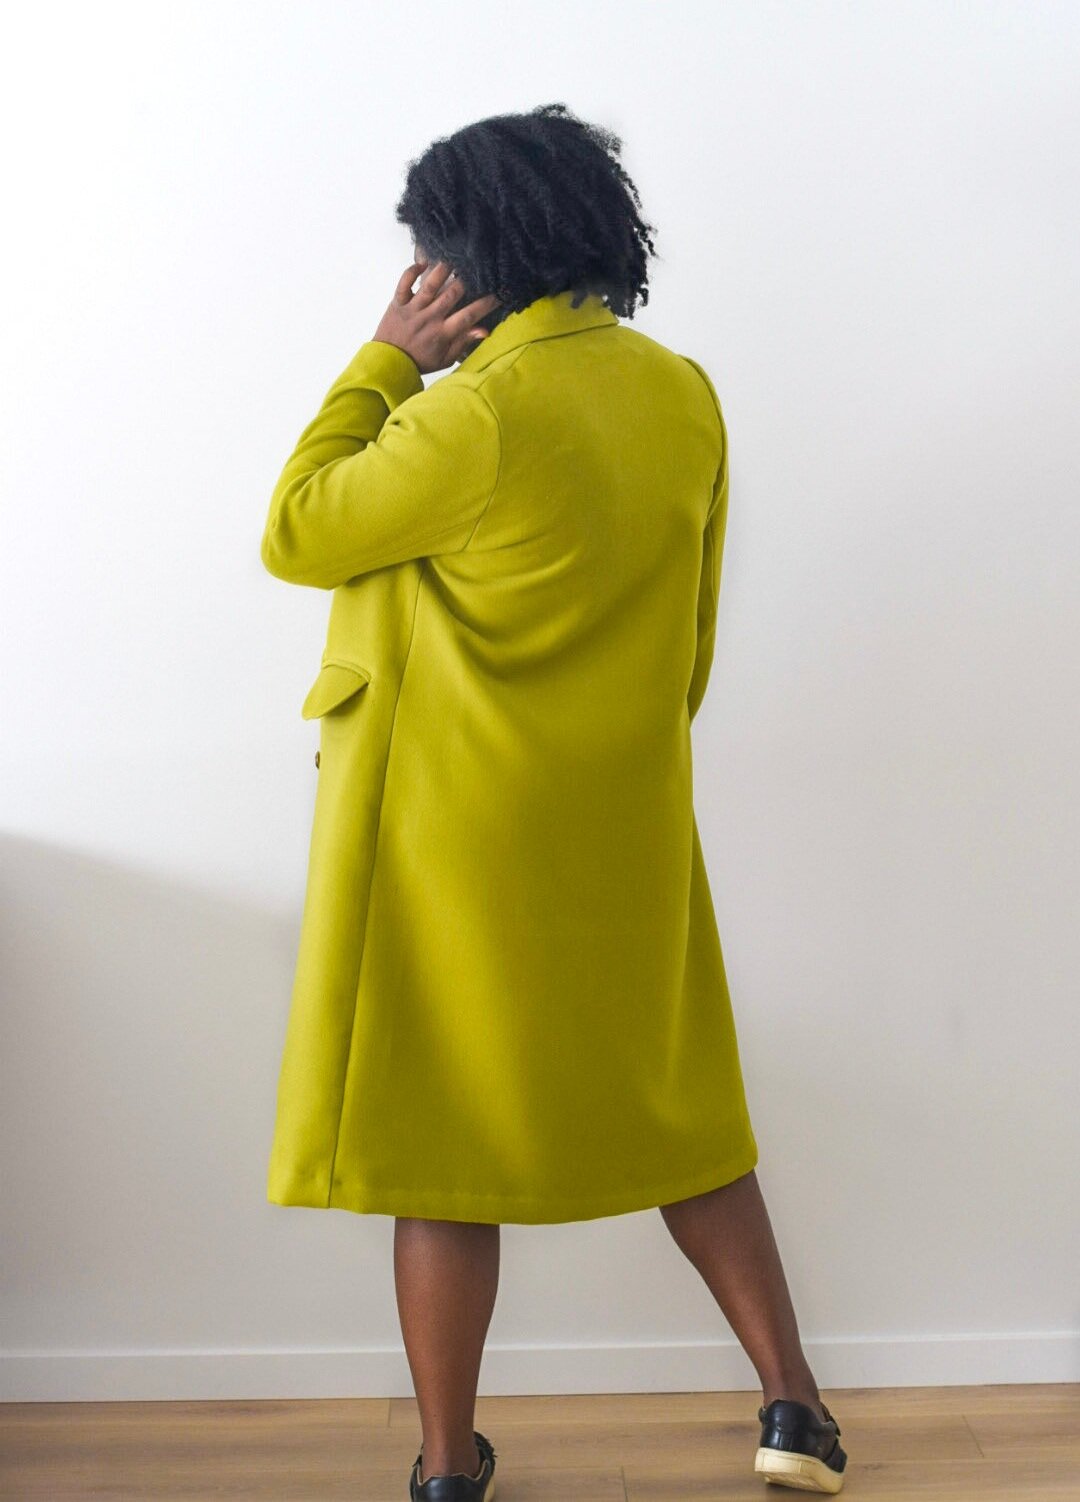
Pattern Details – The Hunter Coat is by Fibremood and is a loose oversized coat featuring a collar and lapel, double row of buttons, a chest welt pocket, and two welt pockets with a flap. It is available in XS to XXXL - 29.9” to 55.1” in the bust and 33.1” to 55.1” at the hips for body measurements. For finished measurements it ranges from 40.75” to 63.50” in the bust and 42.75” to 66” at the hips.

Size Made – I made a size M and graded to L at the hips based on the finished garment measurements. For reference, my body measurement at the time I started this project was: bust 41”, waist 35”, hips 46”
Fabric Used – I used a wool blend I bought from a local fabric chain store. Wool blends tend to be more affordable than wool fabric. Once I have had more practice with coat making, I hope I can work with more quality wool fabric but this blend was perfect for this project.
Pattern Adjustments
1. Shortened the pattern by 10 inches to get my desired length.
2. Graded from a size medium to a large at the hips.
3. Skipped the shoulder pads in the instructions – personal preference.
4. Added a hanging loop to my coat (just before step 10 in the instructions).
5. Under stitched the collar to get it to lay flat (although the instructions didn’t call for it).

Pattern Instructions – This is probably the part I struggled with the most. Honestly, the instructions could have been a little more detailed and thorough on some steps (such as the welt pockets with flap and collar attachment). There were also a couple of times where a step was not mentioned at all possibly assuming it was an intuitive step? I’m not entirely sure. I was hoping this would be a go-to pattern for me. Even though I have made a lot of notes to make my next one easier, I am not sure if there will be a second Hunter Coat. Only time will tell.
Things to note for this pattern
1. Lengthen/Shorten lines – There were no lengthen/shorten lines on my pattern pieces even though they were mentioned in the instructions. Considering I bought my pattern well over a year ago, this may not be the case anymore but that got me worked up a little. I made a line 12 inches above the hem and used that as my line to shorten the pattern.
2. Seam allowance/Pattern pieces – The seam allowance and pattern piece layout information can be found on the last few pages on the instructions. Take a look at that before you start your project.
3. A0 copy – My copy shop pattern pieces were only labeled with numbers. This may be fine if the project has 6 pieces but this was a 20-pattern piece project with some pieces looking very similar. For my own sanity, I went through all 20 pieces and wrote out on each pattern piece exactly what it was.
4. Model sample – Is it just me or is the sample the model is wearing in the photo below unlined? (Let me know if I’m wrong). That is fine with me but I would have appreciated it being mentioned because if I bought it because I was trying to achieve the exact look as the one on the model, that would be important to know.

5. Welt pockets – Take your time with these. If you haven’t made a lot of these, you may want to make a sample first.
6. Trim bulky seams – There are parts of this project that this will be necessary (especially if you’re using heavyweight fabric) although trimming bulky seams isn’t mentioned in the instructions at all.
7. Basting stitches – You should probably put some basting stitches in your sleeves to make them easier to insert.
A lot happened once I started this project – from personal stuff to being confused at multiple steps of the project. I started in November last year and only recently finished it. To say I was happy to be done is an understatement. I am glad that I was patient with this because although it is not perfect, I can tell that my coat skills have improved compared to the first time I made a coat. My patience paid off and I love how it turned out. There is still so much I need to learn about coat making and I’ll keep taking it slow till I get to where I want to be.

Styling – For this first time, I paired my new coat with my Sicily Slip dress I made last year. I think they work well together and I can’t wait to rock this in early Spring when all the snow has finally melted and it’s not freezing cold. I’m curious to hear your thoughts especially if you’ve tried this pattern or plan to do so.

Helpful Resources: Tips for sewing with wool
Seamwork - Tips for sewing with wool (video)
Tilly and the Buttons - 10 tips for sewing a wool coat
Wunderlabel - 13 tips for sewing with wool
Happy Sewing!
Sylvia
XOXO


